
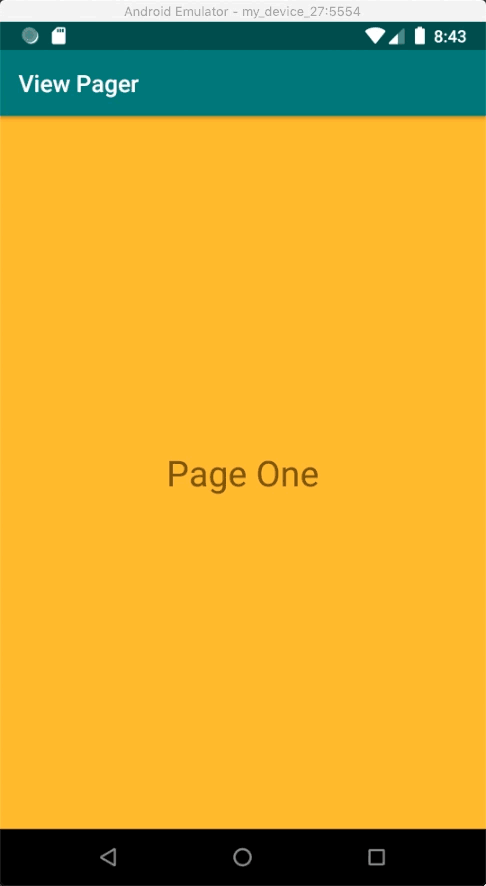
Android ViewPagers allow users to flip through a number of different pages. If you are familiar with iOS, they are similar to having a Scroll View in iOS where Paging has been enabled. Each view in Android ViewPager makes for one new page of the view pager. Here is a video of how the final project will work:
So let’s see what do we need to complete this tutorial. Here are the list of the items, components, codes and classes that you are going to use:
- Three Layouts, one for each of the three views
- An Array to hold the three views in the Main Activity
- A PagerAdapter to adapt the layouts to pages of the ViewPager
So let’s get started. The first thing you need to do is adding three layout to your layout folder.

Let’s call them:
- layout_one
- layout_two
- layout_three
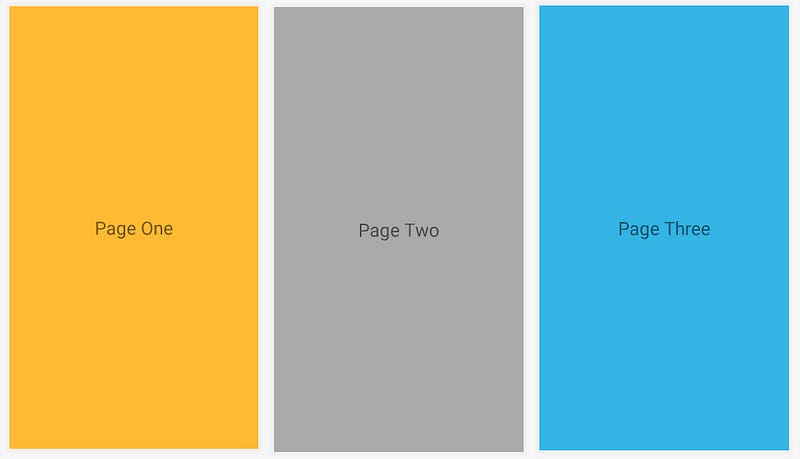
What you put in the layouts are completely up to you. In my case, I put a little text view with a slightly different background color for each of them. Here is the code for all three of them:
layout_one.xml
<?xml version="1.0" encoding="utf-8"?>
<androidx.constraintlayout.widget.ConstraintLayout xmlns:android="http://schemas.android.com/apk/res/android"
    xmlns:app="http://schemas.android.com/apk/res-auto"
    xmlns:tools="http://schemas.android.com/tools"
    android:layout_width="match_parent"
    android:layout_height="match_parent"
    android:background="@android:color/holo_orange_light">

    <TextView
        android:layout_width="wrap_content"
        android:layout_height="wrap_content"
        android:padding="30dp"
        android:text="Page One"
        android:textSize="30sp"
        app:layout_constraintBottom_toBottomOf="parent"
        app:layout_constraintEnd_toEndOf="parent"
        app:layout_constraintHorizontal_bias="0.5"
        app:layout_constraintStart_toStartOf="parent"
        app:layout_constraintTop_toTopOf="parent" />
</androidx.constraintlayout.widget.ConstraintLayout>
layout_two.xml
<?xml version="1.0" encoding="utf-8"?>
<androidx.constraintlayout.widget.ConstraintLayout xmlns:android="http://schemas.android.com/apk/res/android"
    xmlns:app="http://schemas.android.com/apk/res-auto"
    xmlns:tools="http://schemas.android.com/tools"
    android:layout_width="match_parent"
    android:layout_height="match_parent"
    android:background="@android:color/darker_gray">

    <TextView
        android:layout_width="wrap_content"
        android:layout_height="wrap_content"
        android:padding="30dp"
        android:text="Page Two"
        android:textSize="30sp"
        app:layout_constraintBottom_toBottomOf="parent"
        app:layout_constraintEnd_toEndOf="parent"
        app:layout_constraintHorizontal_bias="0.5"
        app:layout_constraintStart_toStartOf="parent"
        app:layout_constraintTop_toTopOf="parent" />
</androidx.constraintlayout.widget.ConstraintLayout>
layout_three.xml
<?xml version="1.0" encoding="utf-8"?>
<androidx.constraintlayout.widget.ConstraintLayout xmlns:android="http://schemas.android.com/apk/res/android"
    xmlns:app="http://schemas.android.com/apk/res-auto"
    xmlns:tools="http://schemas.android.com/tools"
    android:layout_width="match_parent"
    android:layout_height="match_parent"
    android:background="@android:color/holo_blue_light">

    <TextView
        android:layout_width="wrap_content"
        android:layout_height="wrap_content"
        android:padding="30dp"
        android:text="Page Three"
        android:textSize="30sp"
        app:layout_constraintBottom_toBottomOf="parent"
        app:layout_constraintEnd_toEndOf="parent"
        app:layout_constraintHorizontal_bias="0.5"
        app:layout_constraintStart_toStartOf="parent"
        app:layout_constraintTop_toTopOf="parent" />
</androidx.constraintlayout.widget.ConstraintLayout>
By now, you should have three layouts that look like this:
Now, let’s move on to ur Main Activity. The first thing we should do is to store the three layouts in an array. Here is the code for that.
class MainActivity : AppCompatActivity()
{
// Add the three videos into an array
    val myViews : Array<Int> = arrayOf(R.layout.layout_one,
                                       R.layout.layout_two,
                                       R.layout.layout_three)
    override fun onCreate(savedInstanceState: Bundle?)
    {
        // ...... more code coming up for here
    }
}
Next, we should work on a PagerAdapter that adapts the content of the array into pages of the ViewPager. Add the following class at the bottom of your Main Activity file (after the last close brace).
// The class MyAdapter has two arguments, one for taking in the array of the layouts, and the second one for taking the context for making the new views.
class MyAdapter (private val theViews: Array<Int>,
                 private val theContext: Context) : PagerAdapter()
{override fun isViewFromObject(view: View,
                                  `object`: Any): Boolean
    {
        return view === `object`
    }

    // We get the number of pages for ViewPager from the size of the array.override fun getCount(): Int
    {
        return theViews.size
    }

    // Instantiate a new item from the array.override fun instantiateItem(container: ViewGroup,
                                 position: Int): Any
    {
        val thisView = theViews[position]
        val inflater = LayoutInflater.from(theContext)

        val layout = inflater.inflate(thisView, container,
                                      false) as ViewGroup

        container.addView(layout)
        return layout
    }
override fun destroyItem(container: ViewGroup,
                             position: Int,
                             view: Any)
    {
        container.removeView(view as View)
    }
}
The comments in the code above describe what happens in each step. In a nutshell, you would need to know how many pages are there (getCount), and what is in each page (instantiateItem).
Once this Adapter is ready, we have to use it in our Main Activity. We will do that by feeding the current context and the array to its constructor. Add the following code to the end of the OnCreate method:
// added in the OnCreate method:

myViewPager.adapter = MyAdapter(myViews, this@MainActivity)
And that’s about that. You are ready to build and run now. Please keep in mind that the goal of this tutorial was to simplify the process. There are a lot more you can do. For instance, you probably won’t have the views ready in your layout and you might want to create them dynamically.
You can find the project in this GitHub link.
Interested in learning more in-depth concepts?
If you are interested in learning more about mobile app development, I invite you to join my complete iPhone or Android course(s):
Pingback: vidalista buy uk
Pingback: priligy generic dapoxetine
Pingback: semaglutida oral precio similares
Pingback: finpecia 1mg uses
Pingback: metronidazole over the counter cvs
Pingback: sildenafil citrate tablets used for women
Pingback: orlistat xenical
Pingback: ketoconazole mechanism explanation guide
Pingback: ketoconazole indication breakdown
Pingback: toradol onset overview